
Modeling Waves
In our efforts to integrate Next Generation Science Standard MS-PS4-1, we had the BEST time building and exploring our own wave machine!! As a result, we created a Wave Machine!! The machine, constructed from relatively easy to obtain supplies, allowed us to visualize and model mechanical waves as we identified the patterns that make up the amplitude, frequency and wavelengths for our exploration phase of MS-PS4-1: Develop a model of waves to describe patterns in terms of amplitude and wavelength and that waves can cause objects to move. Here’s a video of our creation:
The directions for creating this SUPER fun and colorful wave machine were found in this AWESOME stem resource:
The components are CHEAP and easily obtained. First, I used bamboo skewers, duct tape, two scraps of lumber and Sculpey clay. I made my machine about 12 feet long. Stretching out the duct tape along my classroom floor I then put down the skewers (3″ apart) To keep consistent spacing between the skewers, I used an index card. Next, I sandwiched the skewers between another 12 foot long piece of duct tape. Rolling the clay end pieces took the longest amount of time. I slid them onto the end of each skewer and viola! It worked. The soft clay had a tendency to slide off the ends of the skewers so after the first trial, I baked EACH piece of Sculpey clay and reassembled it by hot glue-ing the on so that it would be a permanent tool to use year after year.
MS-PS4-1: Explore
Using this wave machine was a GREAT phenomenon for student engagement and exciting their curiosity. After we introduced the machine, we dove more deeply into the aspects and features of waves including Amplitude, Frequency, Wavelength, Crest and Trough using this FREE simulation tool of an Oscilloscope.
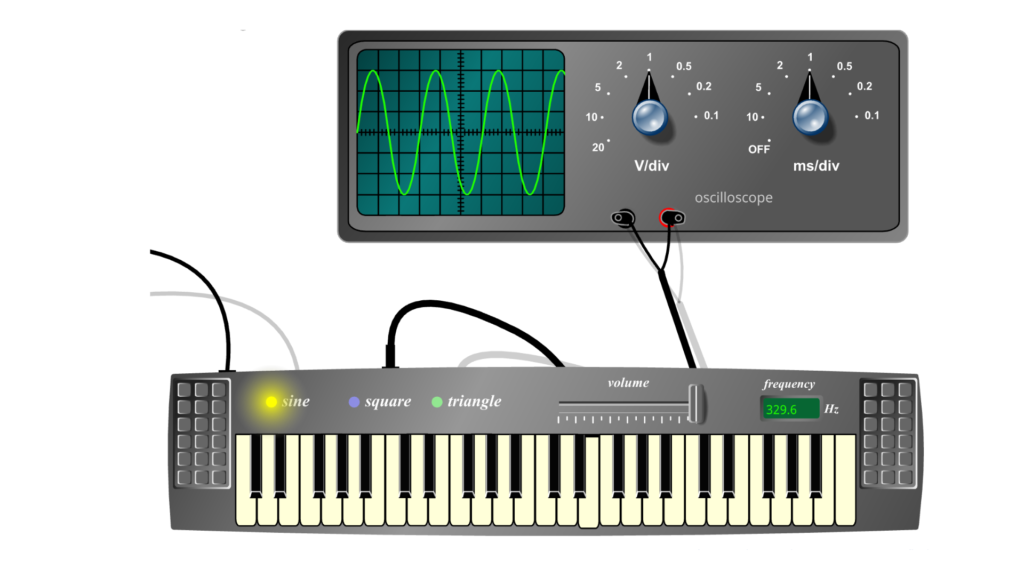
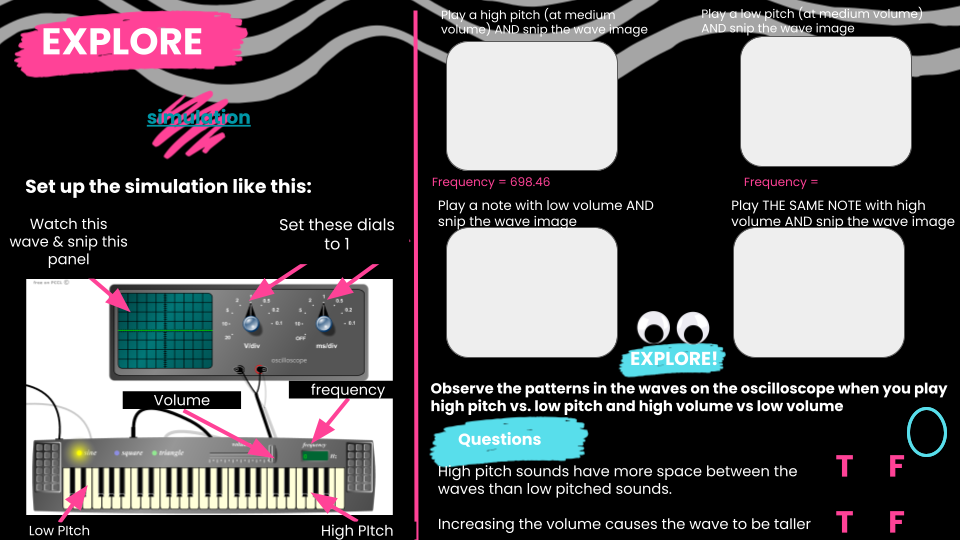
As you play a note on the synthesizer, a wave appears in the panel above. **NOTE, you need to turn the dials to 1 otherwise no wave will show**. To guide students in their exploration, I provided them with an interactive notebook page with specific directions. Students were to play and snip the image of a HIGH tone, a LOW tone, a QUIET tone and a LOUD tone, In doing this, they were able to start making the connection between the shape of a wave that is produced with all of these sounds….the springboard that allowed them to start identifying wavelength and amplitude and start understanding the concept of frequency. Here’s that page:
This page even includes a video that takes students step-by-step through the process of the investigation!!
MS-PS4-1: Explain
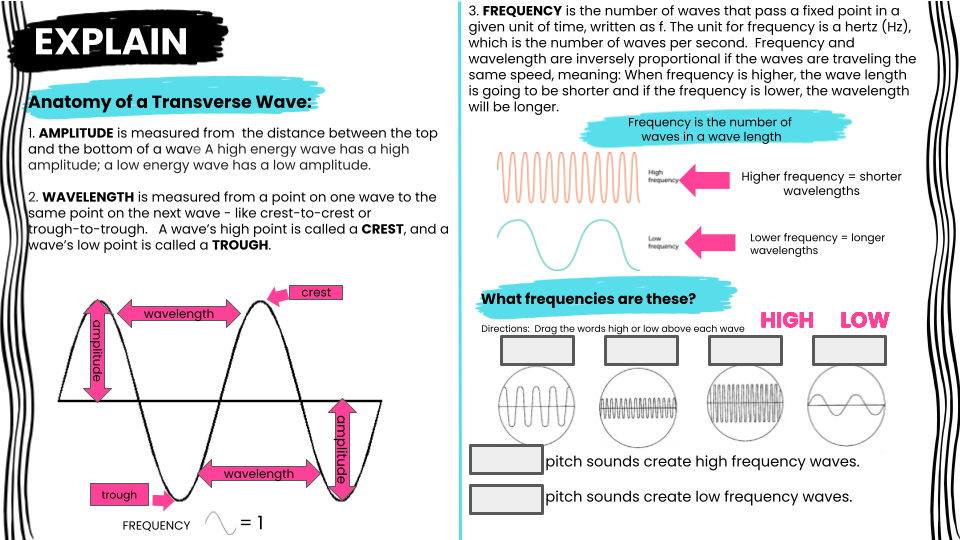
Next, students were provided with the digital interactive notebook page below which dove more deeply into the anatomy of a wave including amplitude, wavelength, crest, trough, frequency.
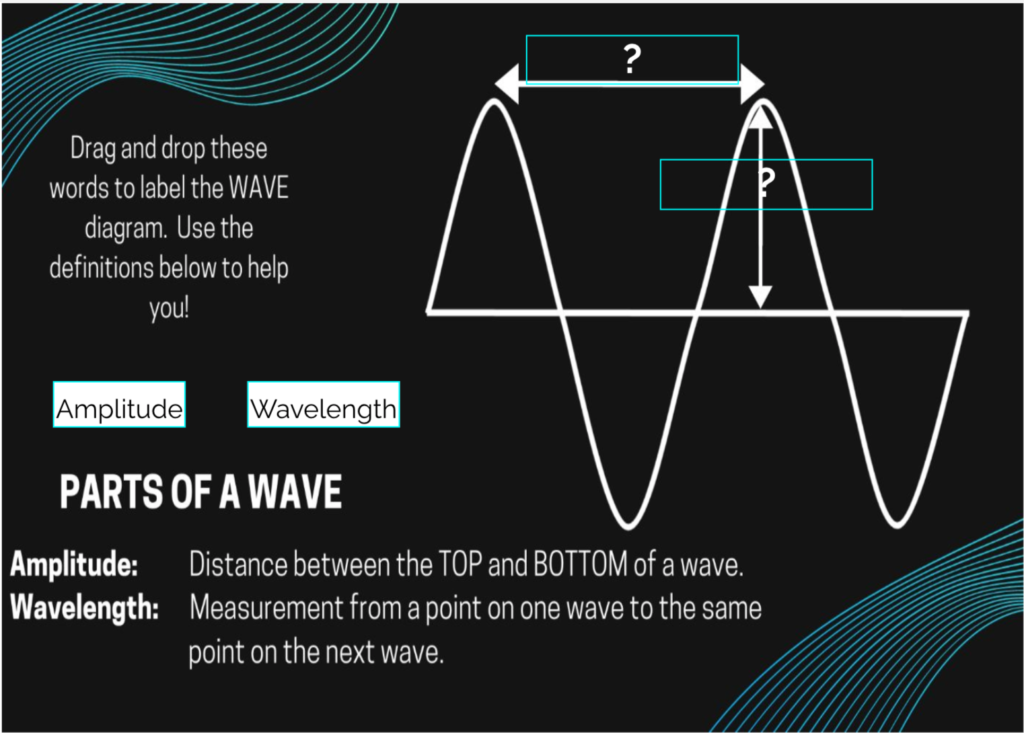
To reinforce and give students a chance to practice identifying the components of a wave, these Boom Learning cards were also EXTREMELY helpful!
Hopefully you’ll find this idea OR these resources to be useful tools to add to your Next Generation Science Classroom. Either way, thanks for
✨Using Your Smarticles✨
FREE ✨Smarticles!✨
Connect with ✨Your Smarticles✨ to get our latest content by email.