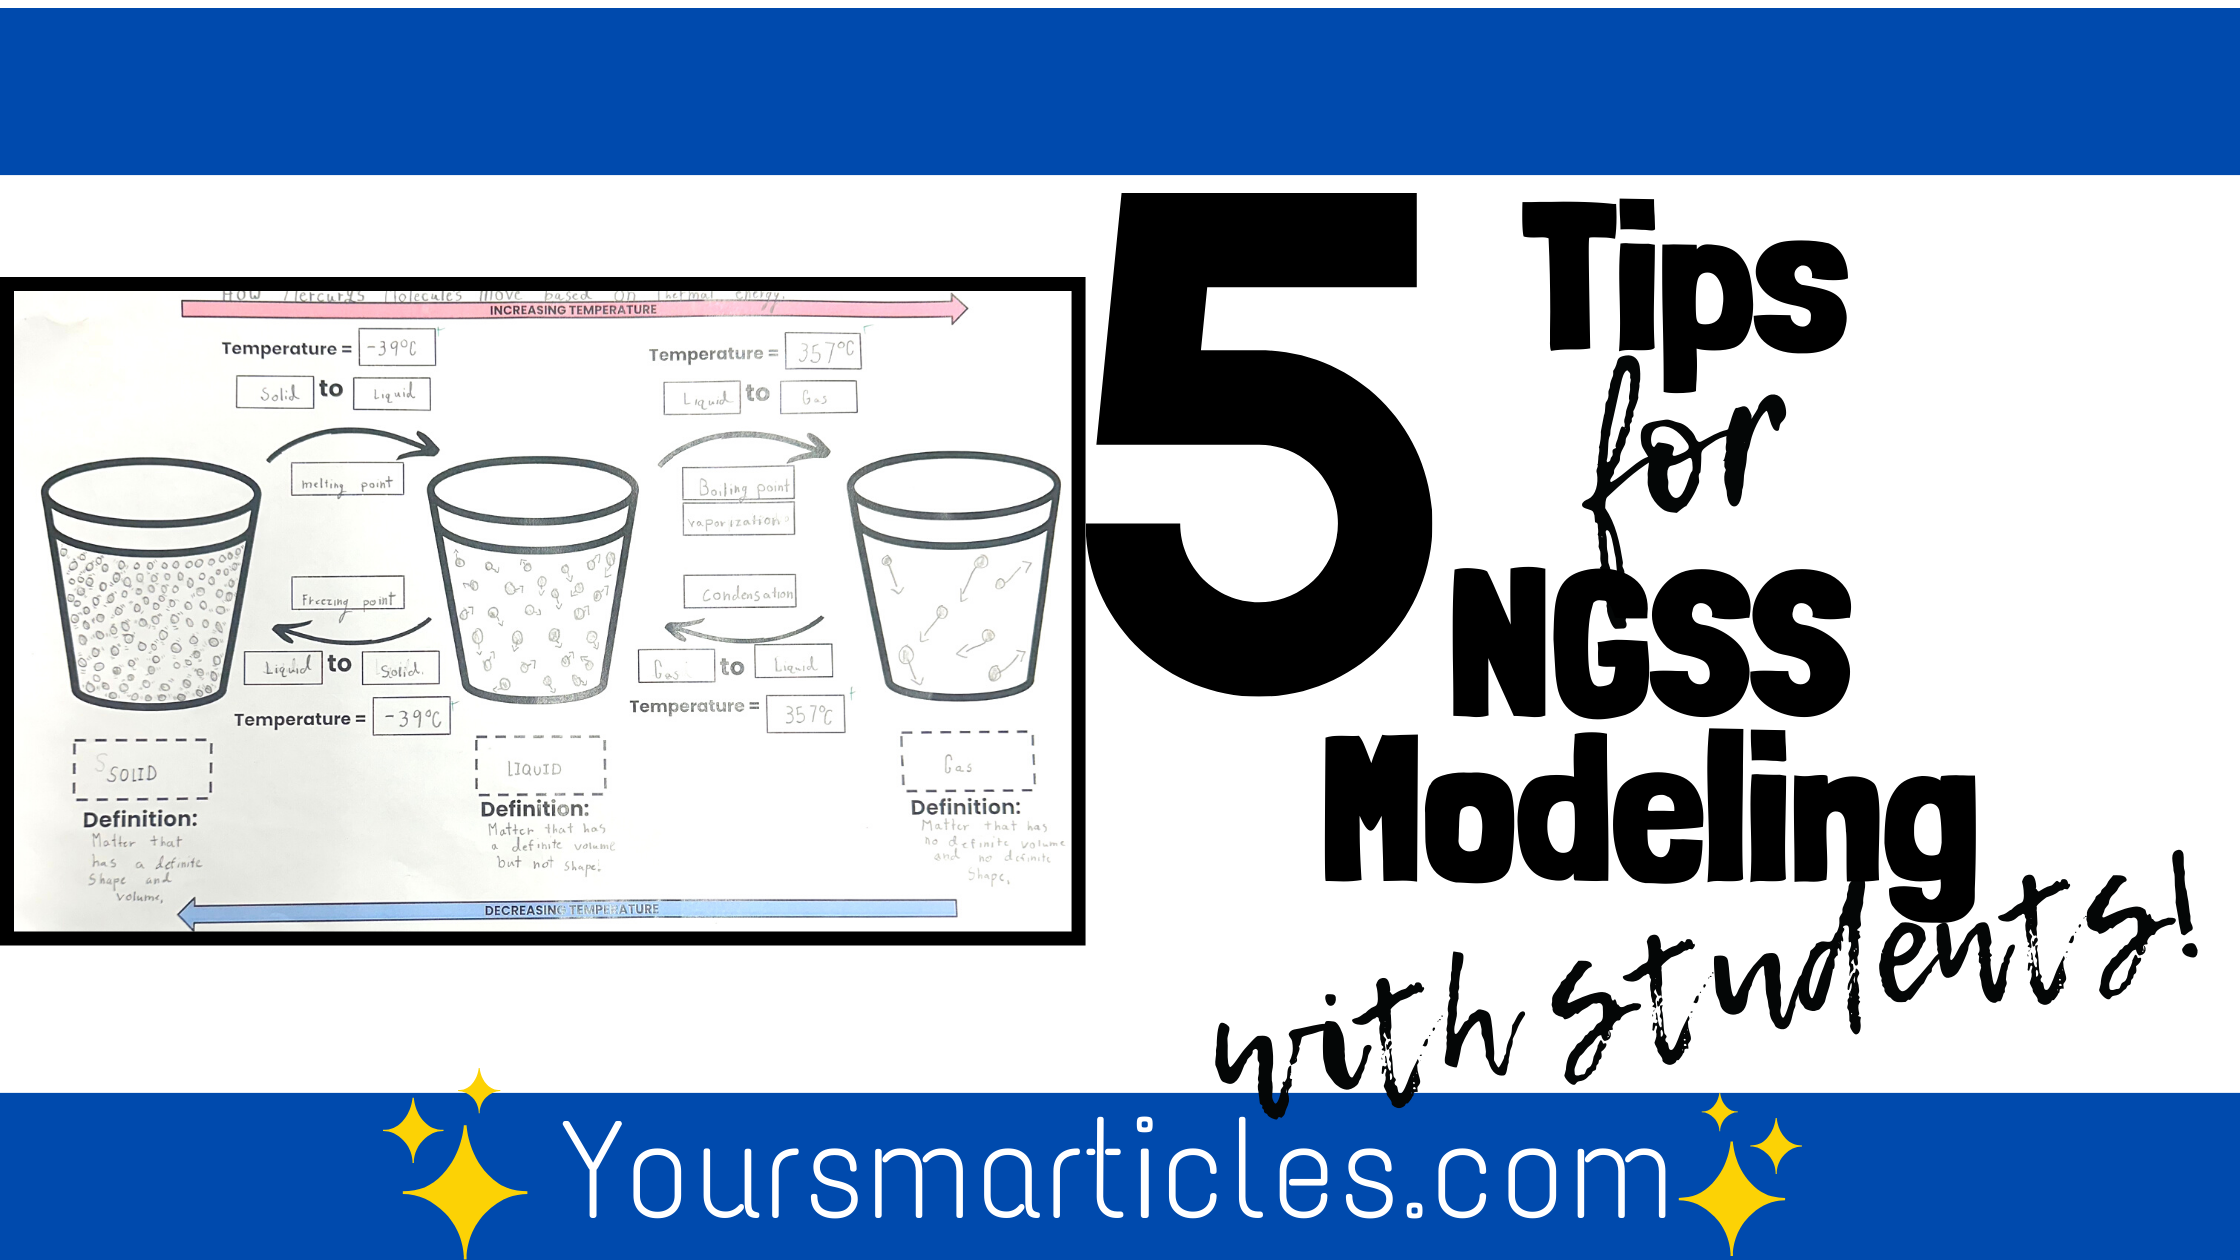
5 Tips for the NGSS Modeling Practice
NGSS modeling can be tricky! If you are an educator that has adopted the Next Generation Science Standards, you have undoubtedly, along with way, encountered the Science and Engineering Practice of NGSS Modeling. And no, this is not a ‘sashay down the runway’ type of modeling, but rather it is dynamic representation of a student’s understanding of an event, system or process. Ultimately they should be a tool used by students for sensemaking relative to the phenomenon that they are investigating. Models can take many forms, including
- Diagrams
- Simulations
- Replicas
- Equations
- Physical Models
As I’ve now worked with NGSS and created NGSS Modeling for over five years (even through the no-touch Covid times) I’ve dabbled in a variety of strategies for getting quality models out of my students. I’ve tried many strategies, refined those strategies, and have finally landed on a strategy that allows students to generate a quality model that can contribute to their own learning.
In this post, I’ll share with you 5 tips for working with the Science and Engineering Practice (SEP) of modeling to get better quality and more effective models from your students.
Tip #1: Large Paper
I went down the digital road with NGSS modeling, implementing Jamboard (RIP) models and using Google Draw (especially during Covid), and I voyaged back to paper modeling for a number of reasons. What I found was that the technical barrier of digital design was enough that students weren’t focused on the end result of having a sensemaking tool, but rather they were getting lost in the designing component, and in many cases, getting frustrated by it too.
For modeling I’ve been using an 11 X 17 sized sheet of paper. Our copy machines support this size paper too which allows me to frontload some basic components on the page which I’ll address in Strategy #2.
Tip #2: Pre-Print Select Images
Using an 11X17 size sheet of paper comes with the added benefit of that size paper can easily be printed on using a standard copy machine. That being the case, it allows me to ‘front load’ images onto the page that might be a barrier to students putting forth the majority of their efforts on demonstrating their understanding of a process rather than focusing on the art work. As a non-artist myself, this is something I can DEFINITELY relate to.
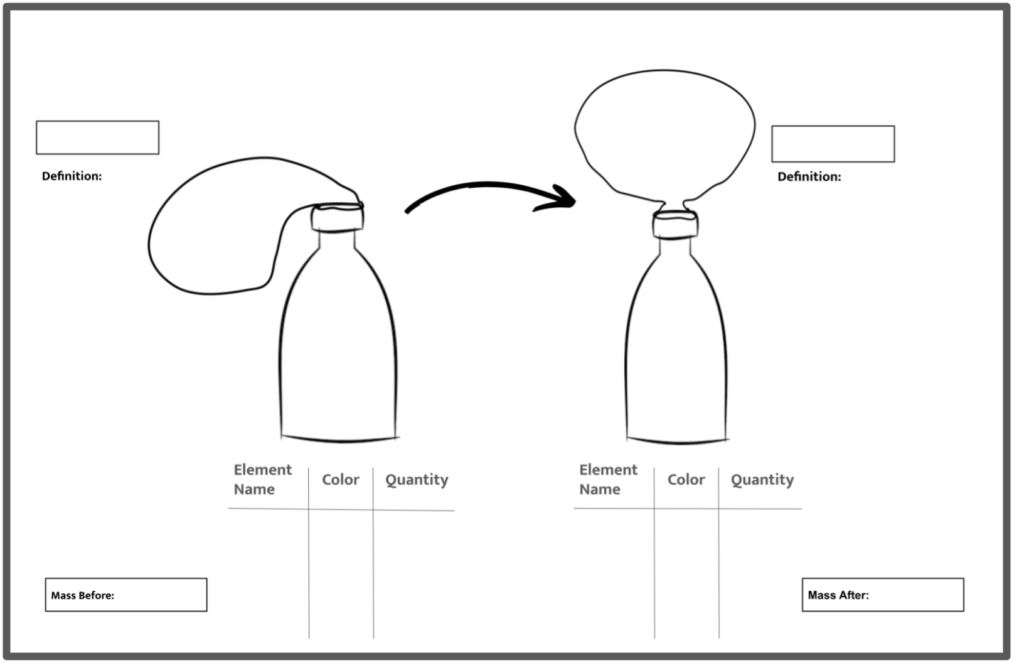
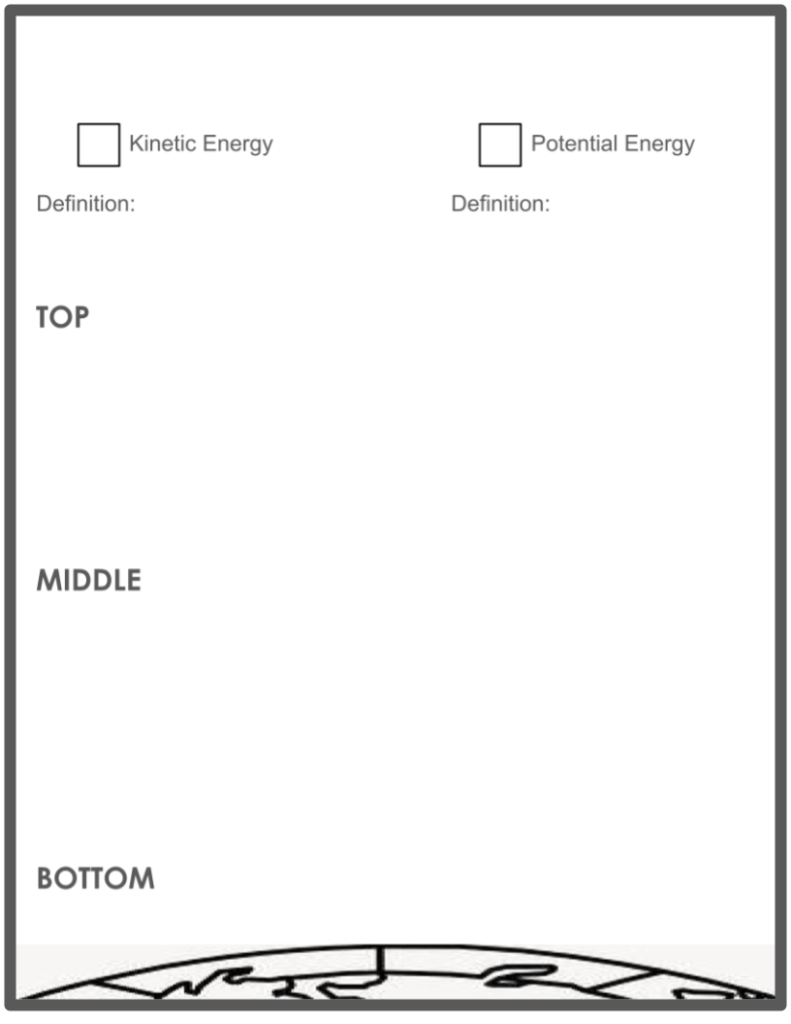
To Pre-print images, I’ve found that designing a Google Slide (or Powerpoint Slide) with the desired background images allows me to print the 8 1/2 X 11 image (or 11 X 8 1/2) image and enlarge it directly on the sheet. Below are a couple of examples of pre-printed images that were then turned in to explanatory models by students.
Tip #3: Vocabulary Banks/Task Descriptions
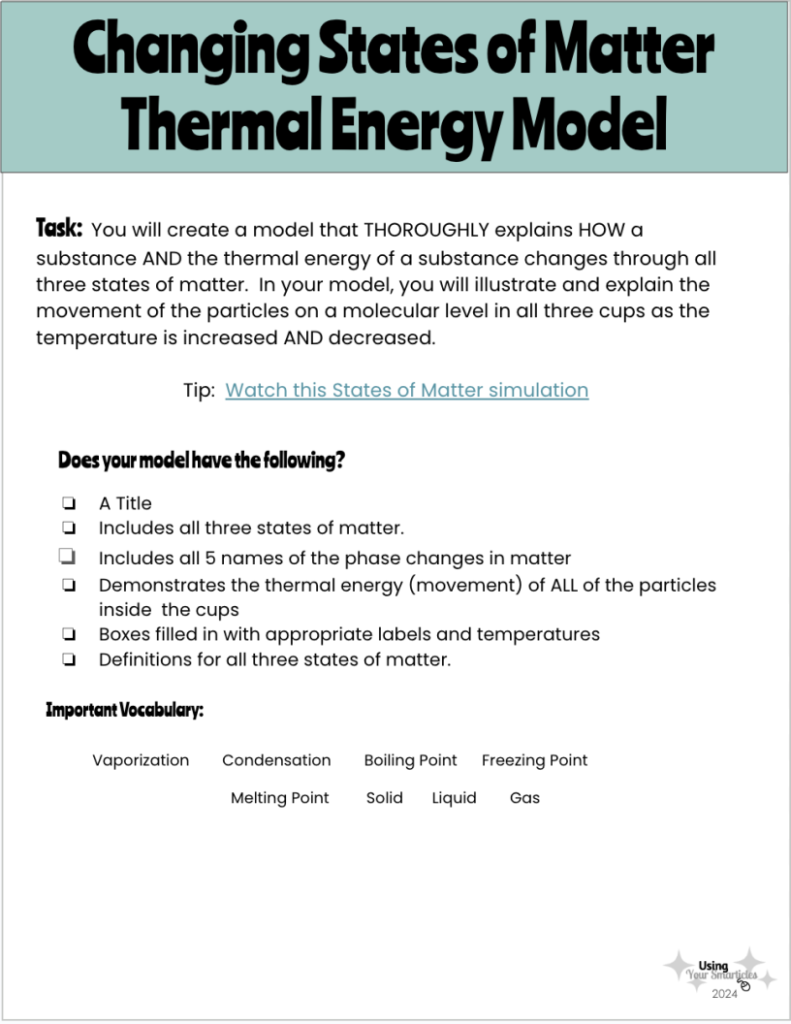
With NGSS Modeling, they emphasize that the students need to understand the phenomenon and be able to improve their understanding of a concept as a result of a model. With this comes the use of vocabulary bank. When I am having my students model, I like to provide them with a list of terms that are critical to the comprehension of the concept that they are modeling. With these terms in hand, students are more likely to research what the terms mean and how they connect to the concept that they are attempting to model. A vocabulary bank can be quite simple too. Usually I provide a list of words in conjuction with the Task Description as seen below:
Tip #4: Color Coded Guides
This tip is my absolute favorite, recently developed by me and has brought me significant success. What I’ve been doing to support students in the process of modeling is providing them with a detailed set of expectations of items to include in their model. And of course, to clarify, this is not a diagram that I’m describing to students and telling them precisely what to write and where, it’s a guide to a model that I’m expecting them to create WITHOUT telling them the “learning” part…that they need to discover as they model. Below I’ve included an example of exactly what I mean. This is a color coded guide showing students what’s expected in their model for MS-PS3-2: Develop a model to describe that when the arrangement of objects interacting at a distance changes, different amounts of potential energy are stored in the system.
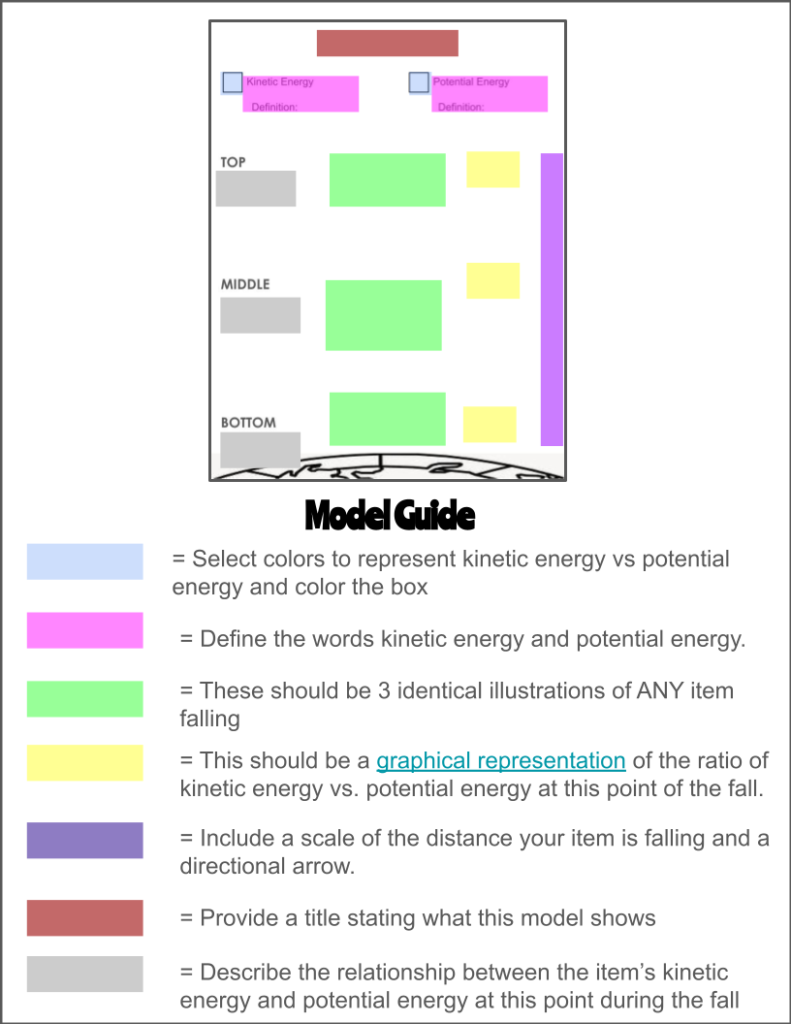
These guides give them just enough to anchor them so they don’t struggle trying to meet the requirements of the assignment, but gives them the security to know they’re headed in the right direction. I’ve been very pleased with the quality that I’ve been getting from students using this strategy.
Tip #5: Rubrics
Grading the NGSS modeling process can be a bit tricky, and isn’t always necessary. Many suggest that the creation of a model by students is a recursive and reflective process whereby students attempt a model at the beginning of an instructional unit and then return to that model to add to/change it to reflect their new learning and understanding of science concepts.
As I’ve continued to model with my students, one strategy I use to capture the recursive nature of modeling is to formatively assess in an informal way by having students attempt a model with a group on a wipe erase board to demonstrate their initial understandings of a concept. Once the unit is finished, I ask students to complete a model independently and utilize a rubric to get a more formal summative assessment of what they’ve learned. Here’s an example of a rubric that I’ve used:
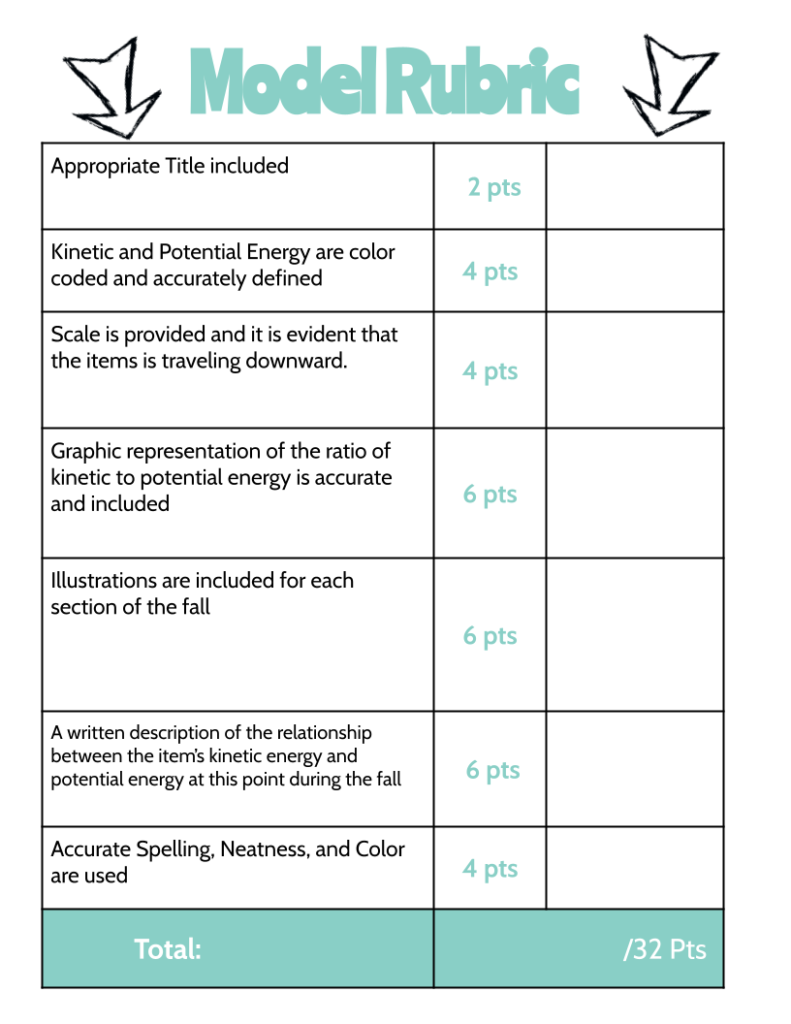
The Wonder of Science suggests using a single-point rubric for more individualized and specific feedback on modeling. Here is a link to some templates provided at that website.
Regardless of the strategies you try, hopefully these tips will help you appreciate the importance AND effectiveness of modeling and the importance of
✨Using Your Smarticles✨
FREE ✨Smarticles!✨
Connect with ✨Your Smarticles✨ to get our latest content by email.