Interactive Display Board with Makey Makey: Engaging Science Project
Have you ever scrambled to find that perfect end-of-year project that both supports your curriculum and sparks creativity in your students? This year, I found myself in that exact position, and guess what? A bit of brainstorming and a slinky led me to an amazing solution: an interactive display using a Makey Makey with digital ‘hot spots’! Intrigued? Let me break it down for you.
What’s a Makey Makey?
For those unfamiliar with the Makey Makey, imagine a mini-remote control that commandeers certain components of your computer’s keyboard. It’s incredibly easy to use and connects to a PC with a simple USB cable. Now, I know the appearance might seem a bit intimidating, but trust me, it’s straightforward and perfect for integrating into your STEAM initiatives or any other classroom projects.
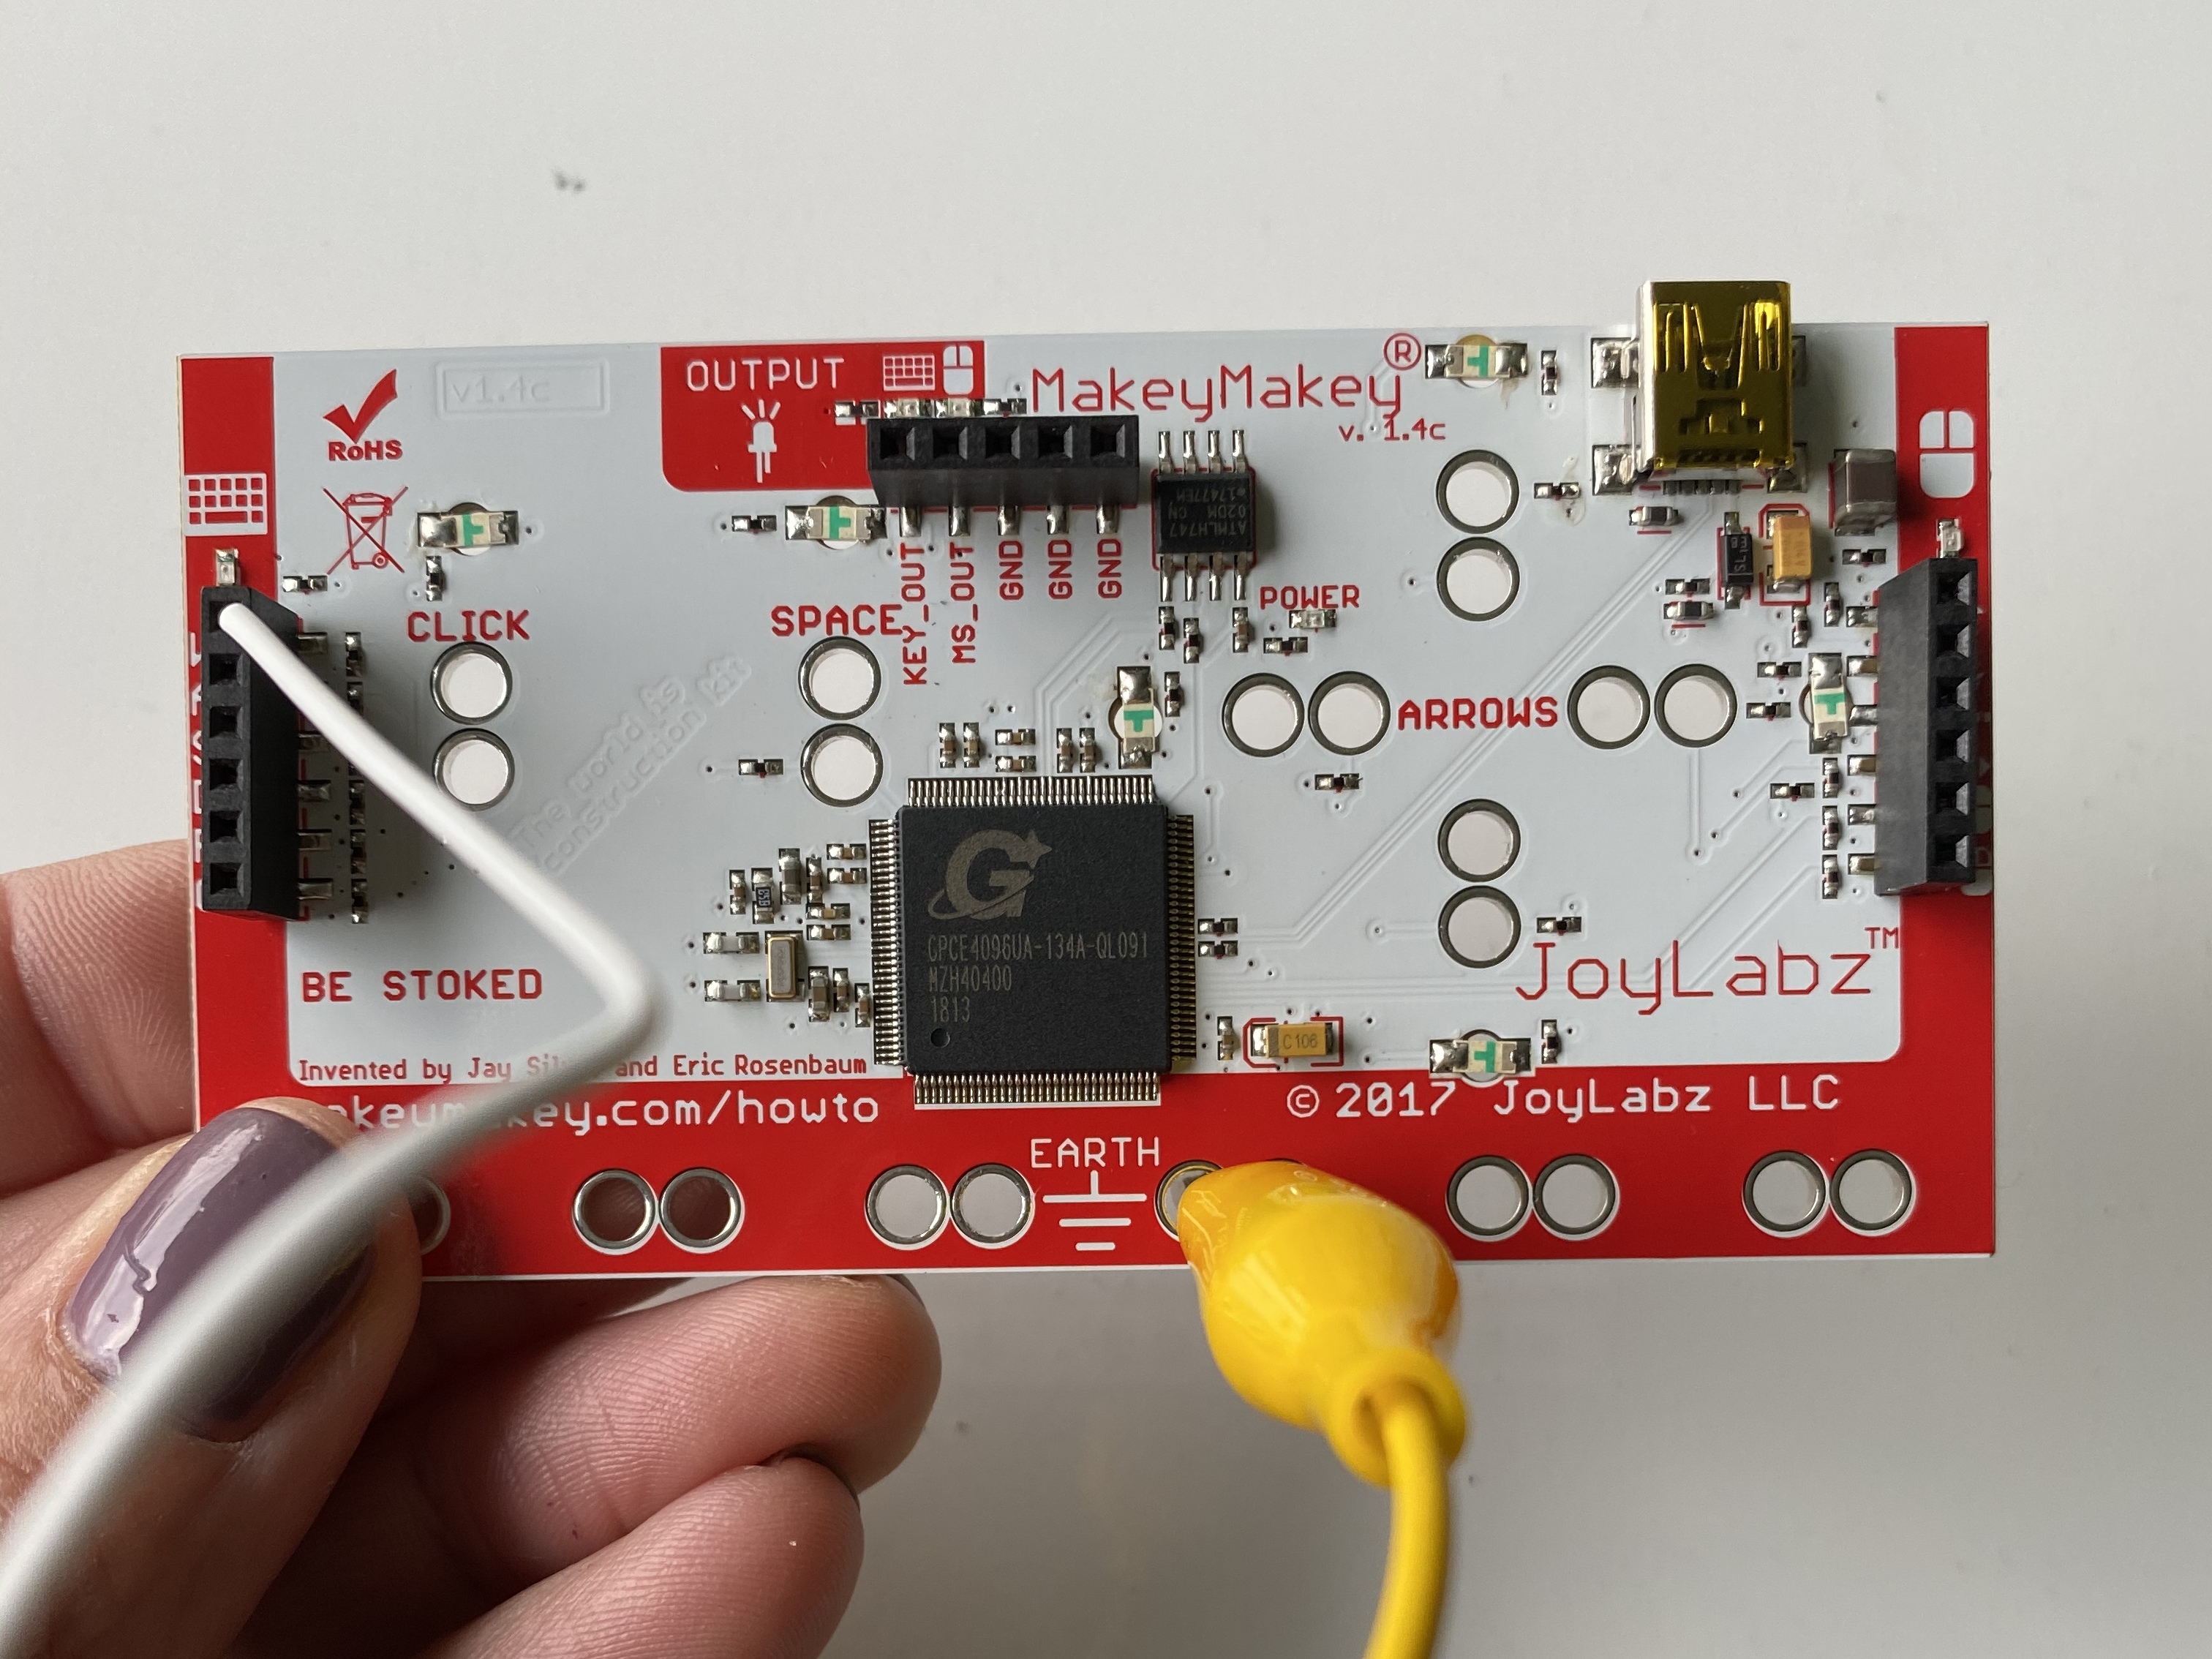
A quick visit to the Joylabz website reveals dozens of fun ideas for using this gadget—from creating a banana piano (yes, you read that right) to making a playdoh remote control. Essentially, you plug the Makey Makey into a PC, connect alligator clips to it and then to something conductive (like playdoh or fruit), and voilà! That item becomes your computer’s new controller. For more creative uses, check out the Makey Makey Blog!
The Project Details
This year, we tackled the Next Generation Science Standard 4-PS4-1: Develop a model of waves to describe patterns in terms of amplitude and wavelength and how waves can cause objects to move. While we’d done a lot of modeling throughout the year, I wanted a fresh, interactive approach. Enter the Makey Makey.
We created an interactive board, akin to a hands-on museum display. By touching ‘hot spots’ on the board, users could reveal information and interact with elements explaining different wave components. Here’s an example of one student’s final project:
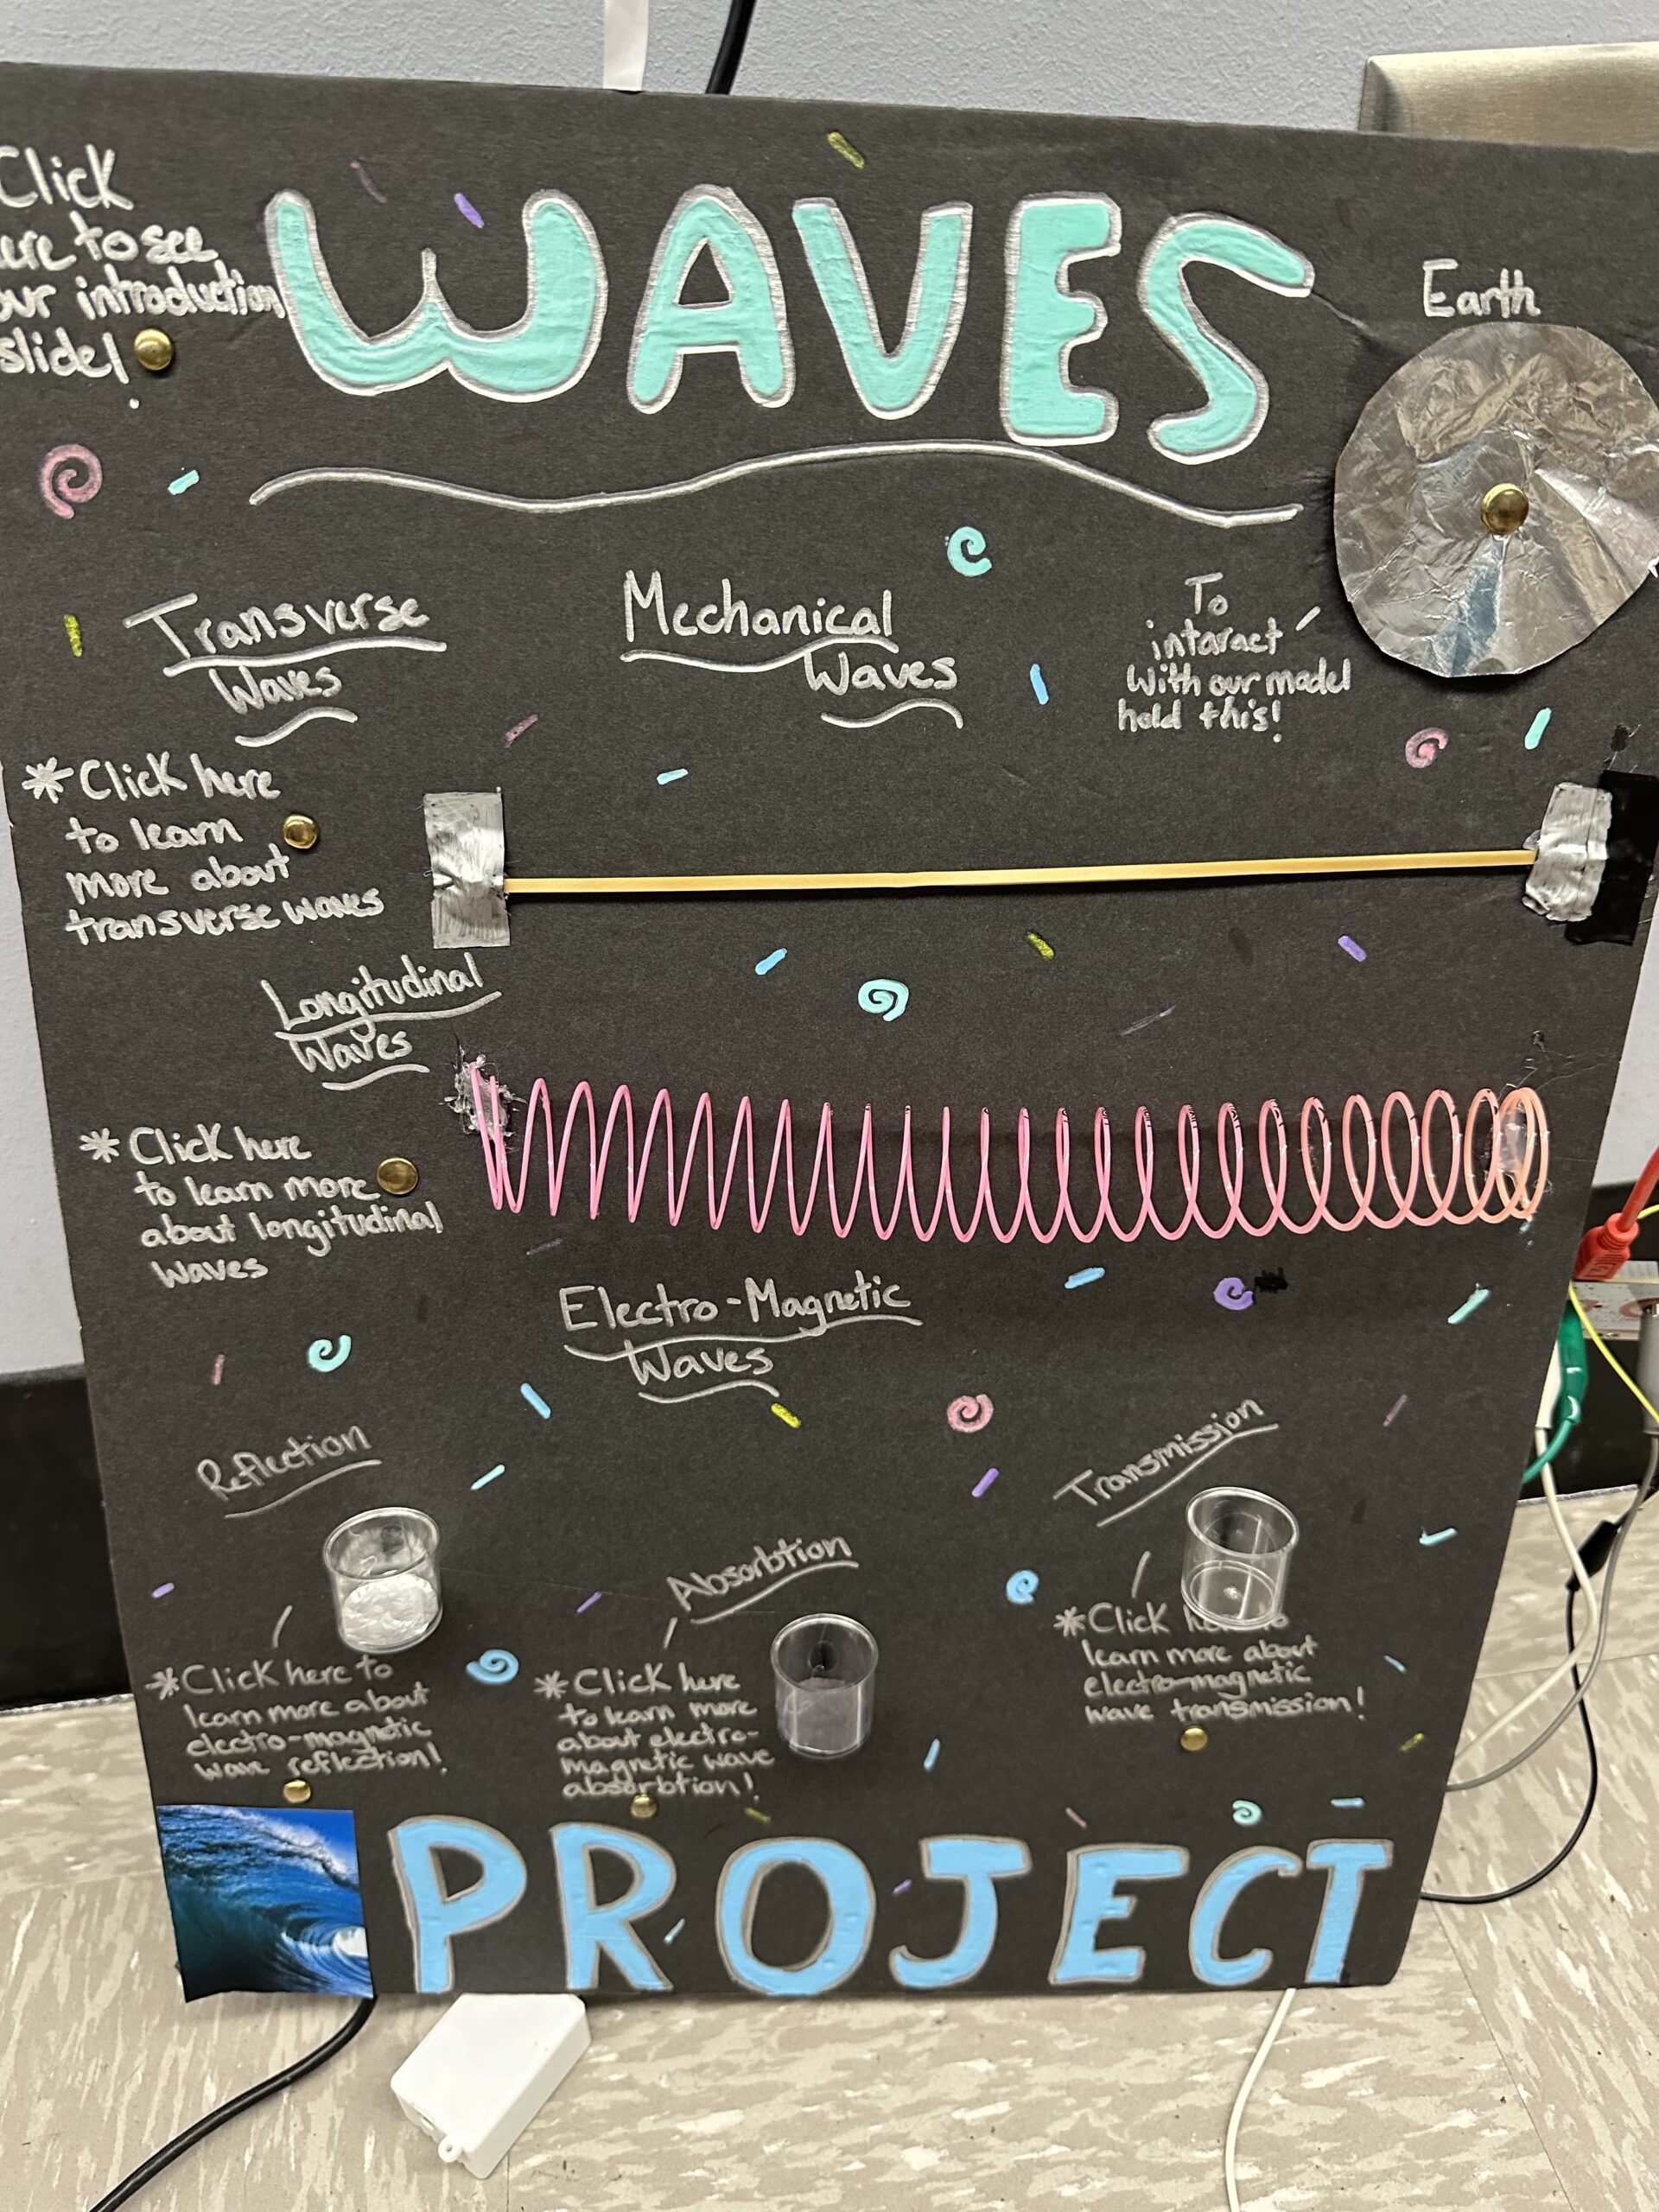
Interactive Display Board for Waves
For each ‘hot spot’, students designed slides in Canva that popped up when touched, explaining each section of the board. Our project included six total slides and six total hot spots. The students marked ‘click here’ areas with brass fasteners that, when touched, displayed information about waves. We included items like a rubber band, slinky, and flashlight to help illustrate different types of waves.
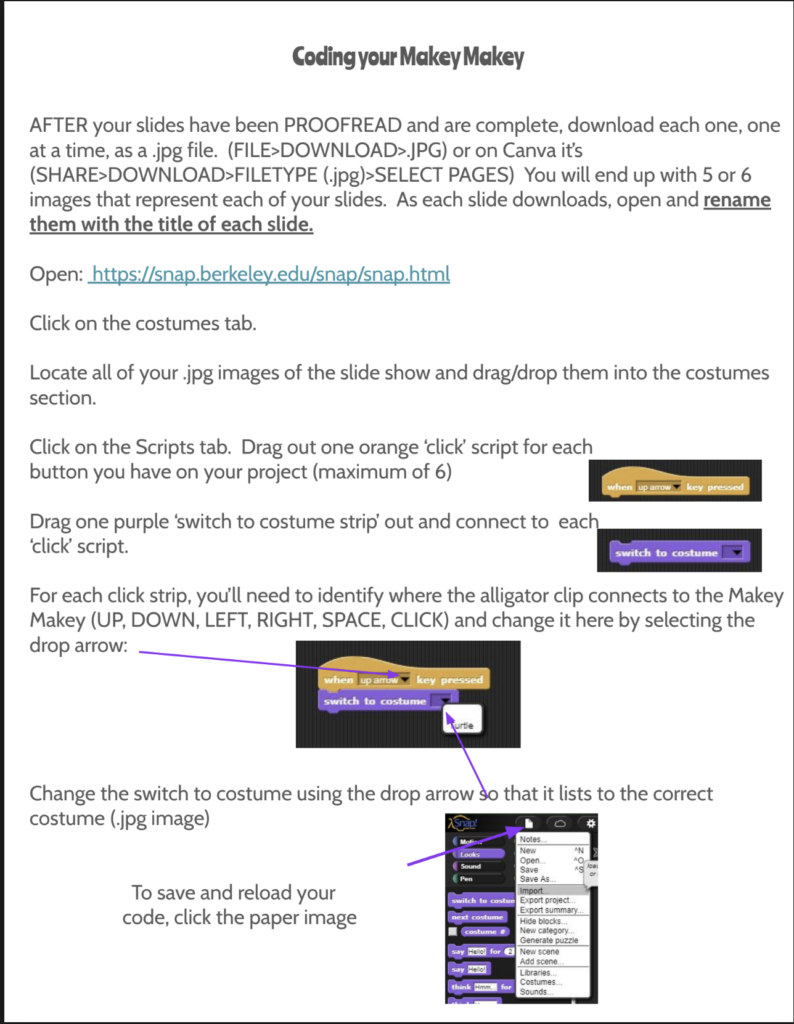
We used Snap for the coding part—an easy choice since no login was required, and students could save and reload their code as needed. The coding directions were simple: six control blocks connected to six costume blocks, each telling the computer to show an image when a key was pressed. The ‘key’ was the brass fastener hot spot connected to the Makey Makey.
Providing Clear Directions
One critical aspect of this project was providing clear, detailed directions. This year, I’ve been using guided diagrams for all our models to give students a better understanding of project setup. Here’s a glimpse of the directions I provided for the Makey Makey project:
Why You Should Try It
The best part about a project like this? It’s adaptable to any content area! Whether you’re teaching science, history, or even language arts, incorporating Makey Makey can bring your lessons to life. Give it a try—you won’t regret it!
✨Using Your Smarticles✨
FREE ✨Smarticles!✨
Connect with ✨Your Smarticles✨ to get our latest content by email.